
We get a call at least once a week about this. There must be thousands of otherwise perfectly good bikes sitting unused in garages because their owners no longer find drop bars comfortable, and the perceived hassle of switching anything out is too great for them to do anything about it. It's not as much of a hassle as you may think and even if it is, the end result is almost always worth it. If the languishing bike in question is a Moser time trial bike with a downward sloping top tube, OK, maybe it's best to start from scratch with a new bike, but otherwise, dive in, even if it's a skinny tire racey bike. Riding a good-to-middling bike with an upright bar has the ability to make you fall in love with cycling all over again, and that's not exaggeration. It can make a bike you were previously scared to ride something you use all the time. And another thing: switching bars is one of the most fun parts of playing around with bikes; It's like having a new bike all over again, for a lot less money.
If you plan on having a shop do the switch, the hardest part is determining what to get.
Here's what you'll need and we'll discuss specifics below:
- A handlebar
- A stem, possibly
- New brake levers, definitely
- If you had STI shifters (commonly known as brifters), you'll need shifters too.
- Grips
- New cables and housing

#1: Determine which handlebar to get.
My first recommendation to people who are fixing up old road bikes with skinny-ish tires is an Albatross bar. It's perfect for this kind of thing because it doesn't sweep back too much. Road bikes are always designed around drop bars, so the top tubes are pretty short. Our Billie and Bosco bars work fantastically on our bikes with longer top tubes, but if you stick 'em on an old Masi it might be too much of a good thing. The concern is a short top tube, skinny tire and steep headtube angle combined with a bar that puts little weight over the front wheel and it might make the bike feel a little twitchy. You can always chop a bit of the bar off if it's too close, or compensate for this effect with a super long stem.
If you want to sit 90 degrees upright on a road bike, you'll probably have to accept some twitchiness. Being uncomfortable on a twitchy bike is a recipe for disaster, but if you're comfortable, than you'll quickly learn to account for the light steering.
Here's a list of our upright bars in order of most recommended to still-recommended-but-not-as-much:
- Albatross
- Choco
- Baby Bosco
- Bosco (probably the 52cm)
- Wavie (not as upright, but sometimes just the ticket)
- Billie (great bar, but maybe chop it down)
If your bike is way too small, meaning the bars are way lower than the saddle, get a Baby Bosco, Bosco, or Tosco; all of those bars have a lot of built in rise that'll take some weight off your hands.
If looking at this list gives you any kind of choice paralysis, just get the Albatross and don't look back.
Any of the choices above will be a huge improvement over what you currently have.
If you look at our selection on the website, you might be wondering about the Albastache bar, which allows you to keep road levers. It's not a bad way to go, and it allows you to keep your road levers (although brifters don't work well on them), but just be aware that it's not quite an upright bar. You'll be slightly more upright, but maybe not as much as you were hoping. If you want an upright Albastache, pair it with a 8cm Dirt Drop stem, or a 5 to 7cm Tallux, assuming you have a quill stem bike.


#2 Figure out the stem
Look at the pictures above: the stem style on the left is commonly known as a quill stem; the stem on the right is known, somewhat confusingly, as a threadless stem. Quill stems slide into the steerer tube of the fork and tighten, and threadless stems clamp-on to the outside of the steerer. There are adapters out there to convert from one to the other, and mostly just from quill to threadless, but it's probably best to stick with the style your bike is designed for.
Once you figure out what style stem you have, then you can either pick out a new one, or make your current one work. I recommend the latter usually, because, if you're buying an Albatross bar, sometimes what you already have is perfect, and if it isn't, you'll then have a clear idea of what length to get.
If you want to try the stem you have, you may need a shim. All of the swept back bars listed under step #1 have a 25.4mm clamp diameter. If you've got a newish road bike with a threadless style stem, odds are you have a 31.8mm clamp. You can take up the space with one of the shims we sell:
If you're unsure of what clamp diameter your current stem has, you can use calipers on your current bar and figure it out, like so:

That's 26.0, despite the reading. A 26mm clamp is a common standard from back in the day, but is kinda niche nowadays. If I moved the stem over, I'd probably get a better reading. If your bike has a quill style stem, you may find that your current bar is 25.4, which means you don't need a shim at all.
If you don't have calipers and don't want to buy a tool, just get a new stem.
But what length though?
Ah, this is the question everybody hems-n-haws over, but between the variables on bikes, bars, and bodies, there's no way to give the definitive answer everybody wants. We can give a recommendation, at least.
The good thing about upright bars is that they have a wider window of comfortable stem lengths than drop bars do. Because drop bars are so tricky to get right, stems often come in minute 1cm increments; that's too fine-tuned for uprights, wethink.
If you have a quill style bike, there's no better stem out there than the venerable Nitto 90-190:
If you've landed on the Albatross bar, get an 85 or a 110mm. Either will work fine, seriously. The difference in body position between an 85mm stem and a 110mm is probably about 5 degrees. The bar choice makes a way bigger difference in position than a 15mm on a stem extension.
There are cheaper quill stems, but probably not with a faceplate or the generous 190mm quill length of the 90-190 that makes getting the bars high easier. If you want to keep it inexpensive and are willing to sacrifice some good looks, get a cheap threadless adapter and use a threadless stem; there are tons of inexpensive-but-fine ones out there.
If your bike uses threadless stems, our selection is minimal, mostly because they're so ubiquitous everywhere else. You'll have no trouble finding these at any bike shop unless your LBS only sells fully integrated e-bikes or something. If you buy from us, I recommend the SOMA Shotwell:
Keep it within 80 to 100mm and it'll work out fine. Threadless stems have the small advantage of being flippable for more or less height. If your bike is really small, you can find them with more extreme angles elsewhere.
OK! That's the hard part. the rest of this stuff is easy. Let's move on:

#3 Get some brake levers
You'll need "mountain" levers, which means they have a 22.2mm clamp. Mountain levers either have long or short cable pull, and you have to match it to your brake. Most of the bikes being converted will likely have brakes like this:

These are called caliper brakes, and they're always short pull. If your brakes look different, it could go either way. Googling the model name (if you can find it) will probably tell you what type of pull they are, but if you're still unsure, just get these levers:
These have different cable anchor points for both long and short pull. They're a little more finicky to set up than the levers that are either one or the other, but you can be sure that these will work with whatever you've got.


#4 Get some shifters
If your bike has shifters integrated into the brake levers, than you'll need new shifters. Both of the options pictured above will work great. The ones on the left are called thumbshifters, and the ones on the right are called bar end shifters, or BES for short.
If your bike has downtube shifters, than you don't need to get new shifters, but you may want too anyway. DT shifters will be harder to reach the more upright you are.
Bar end shifters have the advantage of not eating up any room on the handlebar itself, which means there's more room for your hands to roam around. Thumbshifters eat up a bit of space, but the shifter will be right next to your thumb. Both are great, although I think the Albatross really shines with bar end shifters.
You can also get an indexed trigger shifter, which, by some sad twist of fate, is actually cheaper than our friction options, despite being more complicated internally. If you go this route, beware: you're entering a world of potential compatibility problems. It's too much to go into here. It's better to get a friction shifter and get good at using them.
There's no better friction shifter for this purpose than our Silver2:
If you want to use them as bar end shifters, get these pods. If you want to use them as thumbshifters, get these mounts.

#5 Get some cables and housing
If a bike shop is doing the work, they'll have this stuff. If you're doing it yourself, we sell handy kits here. You'll also need a good set of bike specific cable cutters and a file.
Park Tool has a bunch of useful videos if you're tackling this yourself for the first time.

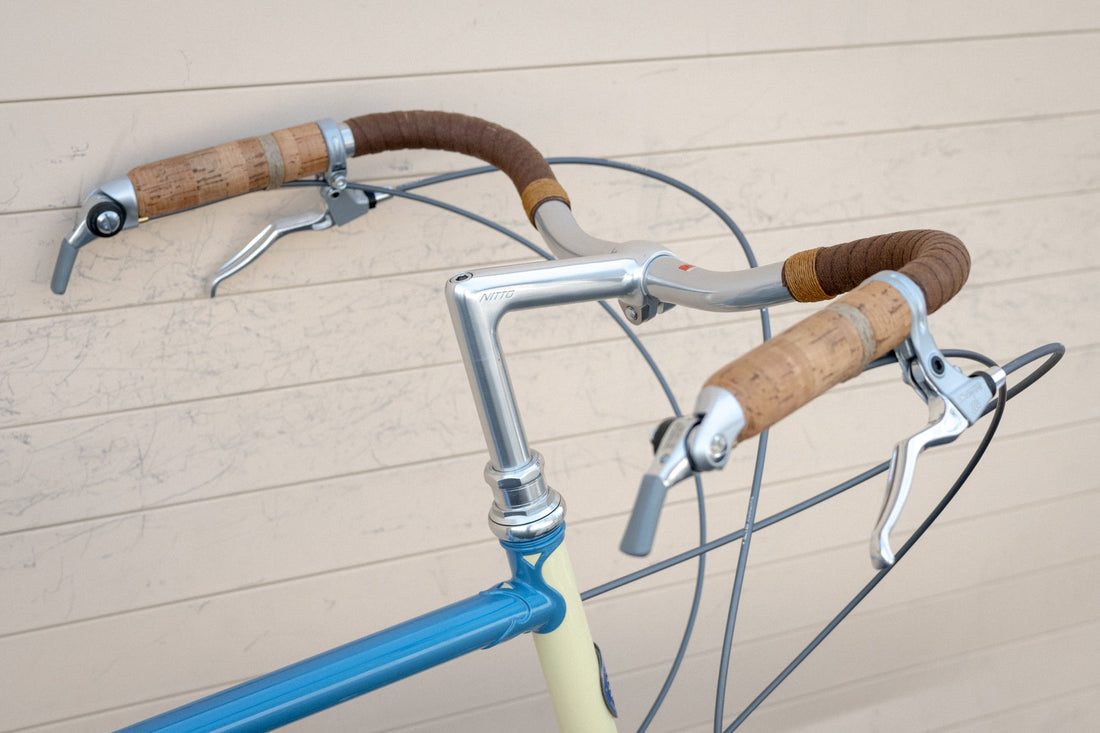
Step #6: Get some grips
Anything works. Grant used some wool felt and twine above. We sell ESI grips if Grant's method is too sloppy. If you're using bar end shifters, it's easier to use handlebar wrap so you don't have to shove the grip over the shifter.
You may want to ride the bike grip-less for awhile to make sure everything is the way you want it before you plug something on there. If there's something you want to change, it'll be easier if there's no grip installed.
Is that it? I think that's it. I hope this helps. If you have questions, you can call us at 1-800-345-3918.
-will